One of the things about Mythic Legions that many fans enjoy is the ability to use them as a canvas to create custom figures. While some of the customs that people do include additional paints, accessories, and even custom sculpting, the reality is that you can create tons of cool new figures simply by “popping and swapping” existing parts! In fact, the ability to swap out parts from these figures was one of the core elements of the line from the very beginning!
So, how do you safely pop Mythic Legions apart for customs and which pieces are removable on the figure? This article will cover that for you!
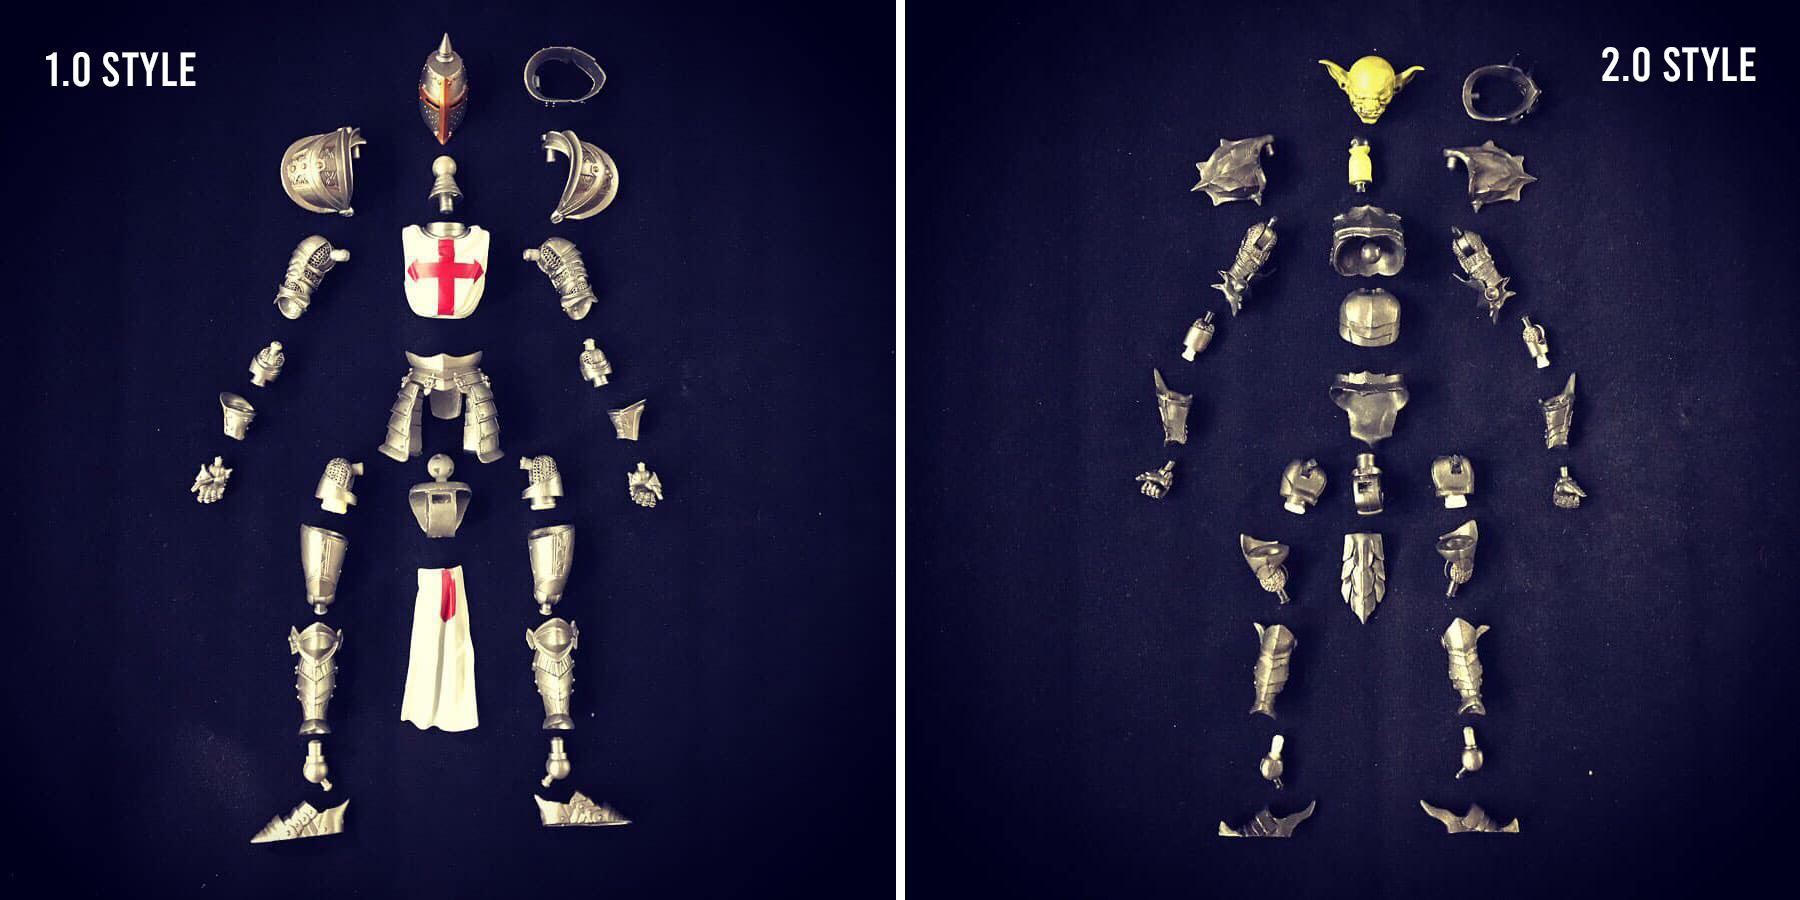
The image above shows how these figures can be broken down into component pieces, perfect for customizing and kitbashing. How do you get these pieces separated? Read on!
Using Heat to Separate Parts
Some parts of Mythic Legions figures are pretty easy to remove, like the heads. Many of the figures come with multiple heads, and it is pretty simple to pop one head off so you can put another one in its place. If a part does not come apart easily, or if you want to remove one of the pieces that is not as simple to “pop” as the heads are, all you need to do is apply heat. There are two ways to do this – either with hot water or hot air. (Note - if a part does not come apart easily or if you feel any resistance, using heat will help prevent breakage from forcing pieces apart).
I generally prefer the hot water method because I can pop apart lots of pieces all at once. I have a large mug that I use ONLY for this purpose (do not use containers you also intend to eat or drink out of) which I fill with water and heat for a few minutes. I then add the parts I want to “pop” into the water and allow them to soak for a bit. You honestly don’t need more than 30 seconds or so. I use a spoon to remove the parts from the water and drop them onto a towel. This is where you need to be careful! Very hot water can sneak into the figure’s parts, so you want to be careful that the water doesn’t leak out and burn you as you handle it! The plastic on these parts will be soft and malleable, so simply use a small amount of pressure to pop the pieces apart (Note - I rarely submerge figures with custom-added paint into hot water, even if they are sealed. I almost always use water before my customs are painted, but if I need heat to reassemble parts later, I often use the hot air method).
Hot air from a hair dryer is nice because it gives you more control over what you are heating and it is safer, but it is a slower method since you are only going to blow dry one or two pieces at a time. It is also annoying since small pieces tend to blow off the table you are working on (I put them in a bowl or other container to prevent this). I like this method for when I need to slowly heat a painted part to reassemble pieces I have popped for customizing. Just be careful not to overdo it with the heat! I have heard of people accidentally melting plastic pieces with a hair dryer or a heat gun, so be mindful of how long you keep any one part under the heat!
The Differences Between 1.0 and 2.0 Body Styles
Once a figure is heated, it is simply a matter of separating the parts, which you can see in the above are two pictures of Mythic Legions figures “blown apart”. It is worth noting that the individual parts are totally compatible with others in that body type, but there is limited compatibility between the two body types. For example, all 1.0 bodies and parts can be used with each other, but you cannot pop 1.0 style arms or legs onto a 2.0 torso. The connecting holes are different. You can get away with using pauldrons and faulds armor from 1.0 on 2.0, but other than those parts, you are most likely going to only swap parts within a figure’s same body style.
1.0 Style = male knights, orcs, dwarves, skeletons
2.0 Style = elves, females, goblins
So, are you ready to "pop and swap" and start creating your own chracters? Check the pics above to see an example of both a 1.0 figure and a 2.0 body to see all the parts that you can separate these figures into. The kitbashing and customizing possibilities are endless! You can also check out another article on our site which digs deeper into the 1.0 vs. 2.0 differences.
Getting Started with Pops and Swaps
While simply swapping parts between figures may not seem as exciting as painting custom add-on pieces, it is a great place to get started - and you can create some amazing new looks ONLY using existing parts and no extra paint! In this article, we explore some of the ideas and show examples of a range of "pop and swap customs."
Of course, after you've swapped some parts, a little extra paint detailing can certainly take those creations to the next level! This is especially true if you are using figures waves like Legion Builder Reinforcements or the Deluxe Legion Builders. Because those figures include parts with very little paint detailing, they are a perfect canvas for not only poppin and swapping, but also adding some simple details to the armor pieces!
Interested in learning more about getting started on customizing Legions? This article, which includes tips and images from many well-known Legions' customers, is one you should check oiut next!
Using Heat on Stuck Joints
While this article was focused on using heat to "pop apart" figures for customizing, it is worth noting that these same methods are great to use on new figures whose joints are a bit tight. Some heat will loosen those joints and allow you to pose a figure without stressing the plastic to the point of breakage. In fact, new Mythic Legions figures are n ow coming with instructions to do exactly this - to heat figure joints once you first receive them to prevent breaking plastic that may be brittle from a trip during the colder months of the year!
Originally posted 12.06.19
Published on 08.26.22